Introduction
This is a page for Assignment which was part of our Ad-Hoc Wireless Sensor Networks
Description of the problem
- A initiator of the group starts the Ad-Hoc wifi network.
- SSId to be provided as parameter
- SSId should use WPA-PSK
- For group members, searches for the SSId availability and joins the network
- SSId is provided as parameter
- Assigns IP address in the range 10.x.y.z where
- x.y.z corresponds to last 3 octets of MAC address
- Displays the neighbour node id and IP address.
- Asks for which dir/file (at least 1GB size) to transfer and to which nodes.
- Can be more than one recipient nodes
- Gets authentication from receiving node
- Can be with guest or pre-created account
- can be .rhosts mechanism
- transfers the file
- File is stored in pre-defined directory on receiver
- can use scp/rcp mechanism
- Provides statistics of transfer operation.
- time to search for the network (for client)
- Time for file transfer and thru-put.
Steps Of solving the Assignment.
Note:
- After Windows 7 , Wireless Network in ad-hoc mode is not allowed.Only infrastructure mode is allowed.
- For the following Assignment we used Ubuntu 16.04 LTS.
- We used bash and Python 3 for our scripts.
- These scripts should be run with sudo permission.
The first step is creating a Ad-Hoc Network .
This can be Done using two methods.
-
Using network Manager.
-
Using iwconfig (command line).
Using network-Manager
In the Drop-down menu you have to select WIFI
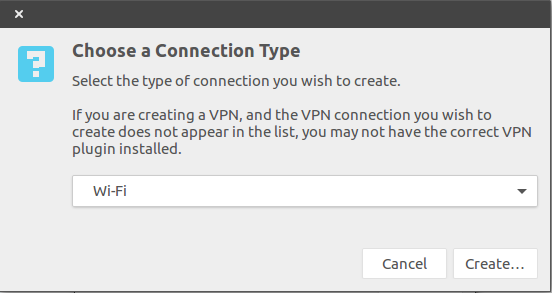
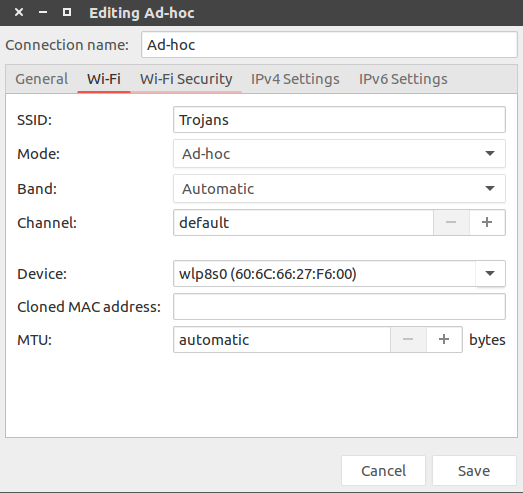
Give SSId Mode should be Ad-Hoc , In device Select your Wifi
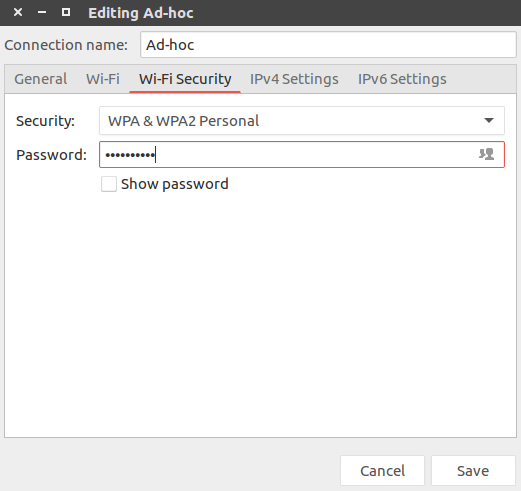
In the page below you have to specify what authentication method you want to use . Here we have used WEP 128-bit passphrase/WEP 40/128 bit passkey(hex or ASCII).
Note:
Using any WPA/WPA2PSK will make the wifi inaccessible by others
network-Manager uses iwconfig ,so wpa-psk is not allowed in this method
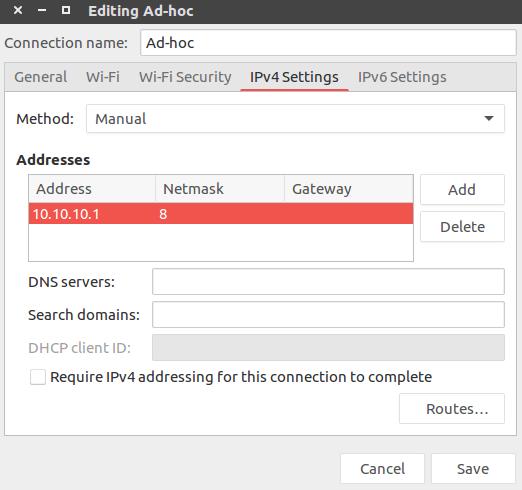
when Ad-Hoc network is created normally the initiator will have mode set to share to other computer
while others connecting to this Ad-Hoc network will have dhcp

You can manually set your ip if you want . its the same way in both in case of creation or joining
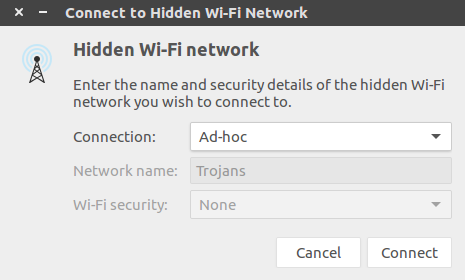
After creation we have to join the network , Press the network adapter button and select connect to hidden network . in that drop-down menu you will find the name of the network you created or which you want to join
Now Ad-hoc network is created
Using iwconfig
We chose this method as we can write a script to automate all the commands
These are the steps required to create the Ad-Hoc network.
- Getting the name of the wireless interface. (Normally the wireless adaptors starts with w )
ifacename.sh
 name=`sudo ifconfig | cut -c 1-8 |grep ^w|tr -d '\n'` #getting the name of the wireless interface
 name=`echo $name|tr -d '\n'`
- The ip should be calculated using the MAC address at each node .
getip.sh
addr=`cat /sys/class/net/$name/address | sed s/://g|tail -c 7 #getting The last 3 Octets of the mac
xh=`echo $addr |cut -c 1-2`
x=`expr $((16#$xh))` #converting to decimal
yh=`echo $addr |cut -c 3-4`
y=`expr $((16#$yh))` #converting to decimal
zh=`echo $addr |cut -c 5-6`
z=`expr $((16#$zh))` #converting to decimal
ip=`expr 10.$x.$y.$z` #appending the converted bits
For creating Ad-Hoc in command line the Network-Manager should be Off.
sudo service network-manager stop
The ip link should be down as we want to change the ip configuration.
sudo ip link set $name down
#$name should be replaced by wireless Adaptor name
Next step is creating a network in Ad-Hoc Mode.
We can only create Ad-Hoc network with WEP in this method .but if you want WPA-PSK then you should use
wpa_supplicant
currently WPA2-PSK is not supported in Ad-Hoc Network
If you are using WPA-PSK then you should follow these steps
To start WPA adhoc network, create wpa-adhoc.conf:
ap_scan=2
network={
        ssid="test adhoc"
        mode=1
        frequency=2412
        proto=WPA
        key_mgmt=WPA-NONE
        pairwise=NONE
        group=TKIP
        psk="passphrase"
}
To run in command line:
wpa_supplicant -cwpa-adhoc.conf -iwlan0 -Dwext
here is part of documentation (wpasupplicant-0.6.9/wpa_supplicant/wpa_supplicant.conf):

# mode: IEEE 802.11 operation mode
# 0 = infrastructure (Managed) mode, i.e., associate with an AP (default)
# 1 = IBSS (ad-hoc, peer-to-peer)
# Note: IBSS can only be used with key_mgmt NONE (plaintext and static WEP)
# and key_mgmt=WPA-NONE (fixed group key TKIP/CCMP). In addition, ap_scan has
# to be set to 2 for IBSS. WPA-None requires following network block options:
# proto=WPA, key_mgmt=WPA-NONE, pairwise=NONE, group=TKIP (or CCMP, but not
# both), and psk must also be set.
using iwconfig to create Ad-Hoc network.
sudo iwconfig $name mode ad-hoc essid $wifiname key 1234567890
#$name should be replaced by Wireless Adopter name , $wifiname should be replaced by desired SSId
The above method ensures that channel is automatically selected by iwconfig so network with least congestion can be used. As Transfer speed depends on the Channel.
Getting the link up.
sudo ip link set $name up
Setting ip for the interface.
sudo ifconfig  $name $ip/8
#$ip will be replaced by the ip which we calculated.
Now we have successfully established a Ad-Hoc Network.
To verify whether the network is created you can use this command .
iwconfig $name
The second part of question is getting to know about the neighbours. we found two approaches , But we chose the later as it is less OS intensive.
First Approach
As we know that broadcast domain of all the ips in the network is
10.255.255.255
when all nodes are connected they will start pinging the broadcast address simultaneously .This process is is piped with Tcpdump so that we can capture this .This capture is piped through Grep where we will specify the ip pattern so that only ips will be extracted.
ping -b -c 5 10.255.255.255|sudo tcpdump -i $name -n -c 5 ip |grep -o '[0-9]\{1,3\}\.[0-9]\{1,3\}\.[0-9]\{1,3\}\.[0-9]\{1,3\}'
Second Approach
In this approach we tried to get the neighbour information using
arping
through which we can send Gracious arp which updates the neighbours ARP-table.
** The arping with Unsolicited ARP mode is accepted till UBUNTU 14.04.**
To Enable this feature in UBUNTU 16.04 we have to change the arp_accept bit to 1 in
cd proc/sys/net/ipv4/conf/$name/
We can use the following commands.
the arp_accept file will rollback after the system restarts.
cd proc/sys/net/ipv4/conf/$name/
sudo su
echo 1 >arp_accept
exit
After enabling , we have to run arping in background so that it will update the neighbours whenever they arrive.
arping.sh
sudo arping -A -c 5 -I $name  $ip  > /dev/null
#/dev/null is used to redirect output out of command line.
To obtain list of neighbours we have to get ips from ARP table.
arptable.sh
arp -n -i $name |grep -o '[0-9]\{1,3\}\.[0-9]\{1,3\}\.[0-9]\{1,3\}\.[0-9]\{1,3\}'|uniq
#get unique ips from arp table.
For monitoring the Neighbours we have to get the latest information from the ARP-table ,We use ARP Suppression which will delete all the entries .In this way only the nodes which are up will be able to send Gracious ARP which will update its table.
We can perform this using the following command .
sudo ip link set wlp8s0 arp off
#This will Disable the the adopter from sending or receiving ARP requests or responses.
sudo ip link set wlp8s0 arp on
#This will Enable the the adopter from sending or receiving ARP requests or responses.
Further communication is done using scp .If you are conserned about security and performance then we can use WPA2-PSK with nc as it will be nearly twice faster than SCP.
You can get the Project here
In case if you any issues or for further assistance please contact me here Naveenholla